Showing posts with label tutorial(ish). Show all posts

Thursday, December 03, 2009

Little Journals

P1120043

I wish I thought to do it more often, but one of the most entertaining activities for me to do with the kiddos is drawing+journaling. For these little journals (cut/tear uniform lengths of paper, fold, staple, cover binding with colored masking tape), I gave them prompts, and they, of course had many charming and interesting answers.

P1120047
Among my favorites, Collin's "I am most grateful for: God"

P1120045
and Iliana's "The thing I most want for Christmas is: a toy of the inside of a cow." I was also pretty impressed with Edward's "My favorite food is: pickles and carrots." (And all this time I thought it was pizza, grilled cheese and chocolate)

Picture prompts for little ones:
A picture of
yourself
your family
your house
your favorite animal
your favorite food
favorite thing to do in the fall/winter/summer/spring
your best friend
I am most grateful for:

Wednesday, October 21, 2009

So I Made These Pumpkins...

P1110660

They're made of salt dough (recipe follows). And I wanted to make them into little charms for necklaces for goody bags for a Halloween Party. But, the holes I poked were lost when the little guys puffed up while baking. Didn't account for puffage.
So now, I have these... any suggestions? Game pieces? I know, bullets for a pumpkin gun, right? No time for crafting a pumpkin gun. Sorry.

P1110557


Making salt dough is a super fun and forgiving craft(but clearly not the best choice for making jewelry).
Here's how it goes:
2 parts flour (2 cup)
1 part salt (1 cups)
1 part water (1 cup, add more if necessary)
optional 1 T. vegetable oil

P1110562

Mix in a bowl, then knead on a floured surface until nice and elastic. Shape and sculpt. Bake on a cookie sheet in 250F oven for a couple of hours. Items must be small and not too thick or they would have to bake for a very long time.
Bear in mind- puffage.

Friday, September 25, 2009

High Profile Collaging


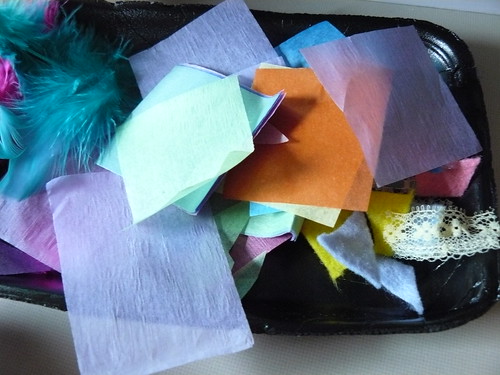
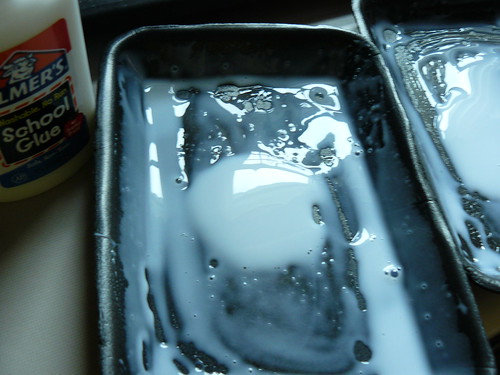
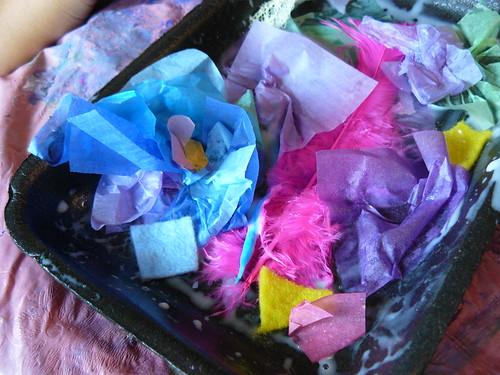
Along with the tp tubes, I also have an ever-growing collection of little styrofoam trays. Thought they would make nice canvas+frames for some flamboyant collagerie.


Glob, smoosh and smear school glue onto tray.


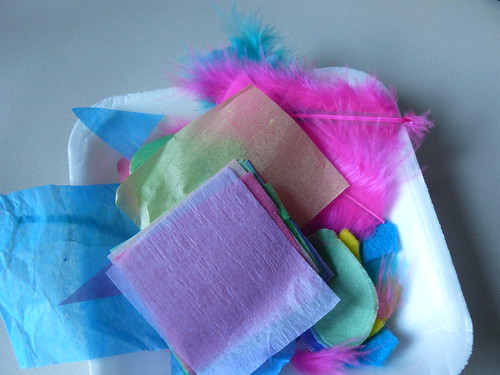
Gather little pieces of tissue paper, feathers, bits of lace,snips of felt, etc...


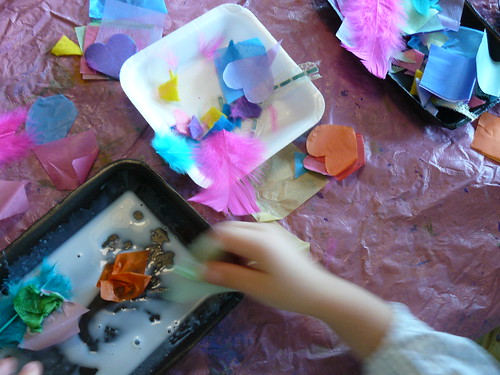
Press bits into glue.

Ta-Da!

(We also sprinkled glitter onto them... but I liked them better pre-glitter)
I'm not sure about the hanging mechanism, but a whole collection of these would look neat displayed on a wall. Would have to buy a lot more clearance produce, though.

Friday, August 28, 2009

More Handmade-ness


Yet another homemade gift:
Soft baby rattles made from Ikea fabric.
Of course, you don't have to use Ikea fabric, I just didn't realize- in the heat of the crafty moment- that I did have a character design fabric in my stash already.
I saw this post (I feel like an index for the internet), and I had to make some. NOW! (the link referred to a tutorial, but I couldn't find one. I did however happen upon too, too many beautiful Dutch blogs. Hopefully this isn't too infringe-y, for the record- this is not my original idea.)

1. Loosely cut around chosen design.

2. Choose a coordinating fabric for the back- face right sides together and trim so both pieces are the same shape. These are small enough that I didn't have to pin them.

3. Sew on a machine using a straight stitch, leaving a 3/4" opening.

4. Turn right side out and stuff with polyfil or wool. I tucked a few little jingle bells in there.


5. Sew together the opening by hand, using very small tight stitches.

This is the exact same concept as making a pillow- except, tiny and with bells. Also- if you are going to make these- just do a bunch, as it seems babies come in waves! Also, if you are about to have a baby and you are reading this- just pretend like you didn't :) No surprises around here!


Ta Da! Easy to grasp softy rattle for your wee-est new friend.

Friday, May 15, 2009

Mother's Day

For Mother's Day, we made up accordion style brag books. Other than having the photographs printed, I was able to use only materials that were already on hand. There are hundreds of great tutorials for these on the internet, but I couldn't find one that expressed the simplicity of my technique. And honestly, I could have benefited from a little (A LOT) more attention to detail. But. I actually wanted to get these done in time for Mother's Day.
These are great for any occasion. I think the "inspiration" for these came from my mental index of Martha Stewart craft projects- this one in particular.


1. Have kiddos make drawings on pieces of paper a little bit smaller than the size of photograph you plan on using (I used 4x6). We did outlines with marker, then filled in with watercolors.

2. Have photographs printed.


3. Cut out strip of paper from a large piece of sturdy stock, or piece together smaller pieces. I added a 1/2" to each frame, making for 4.5"x6.5" frames, and I took the longer dimension- 6.5" and marked with a ruler from the long factory edge of the paper. Measured the full length, then divided by 4.5- which gave me 5 frames/sections/spaces. 6 would have been better as the covers would have aligned to be more booklike. Trim off excess- so the strip of paper was 6.5" wide and 20.5" long. Measure and fold the sections at 4.5" increments. You will have a big zigzag.


4. Cut 2 lengths of ribbon/yarn/thread and glue across the width of what will be the front and back covers (the exterior when zigzag is squished together). Glue previously made art to covers (will hide the ribbon). You can also layer the art onto another piece of paper (or cereal box card) to create a mat-like effect.


5. Glue or use double sided tape to adhere photos to the sections. It's really nice if you have only vertical shots- then you can stand the book up as a display. I didn't have that many to choose from, so I just used vertical on one side and horizontal on the other- at least one side was display-able. Also, we left one spot open for as note.


6. Fold together and tie up the sides.


7. Give to mama/grandma on Mother's Day with lots of flowers and sweets and help around the house and maybe time for a nap.

Wednesday, April 29, 2009


This sticky-back foam stuff is a little too newfangled for me, but I read that it's good for coordinating little fingers.


Pudding paint.
1. Make vanilla pudding.
2. Divide into little bowls.
3. Add 2 drops of food coloring, stir- add more food coloring as desired.
4. Spoon onto "palettes" add leftover-from-breakfast pancake as paintbrush (or pudding to mouth vehicle)
5. Paint onto glossy finger paint paper- or big, white plate, or some other non-toxic, non-absorbent surface (directly on the table of you don't mind the mess.
6. Did I just teach them to eat paint?


Almost time for salad!

Friday, March 27, 2009

Helen Frankenthaler+onions

We need to send thank you notes for all the goodies Edward received for his birthday. So, I decided to take some inspiration from Helen Frankenthaler:

Turn on Guns N' Roses. Loud. Start with Patience, move on to Paradise City, then Sweet Child O' Mine, and so on. Turn 2 year old loose with watercolors, brushes, water and big paper. Let the colors fly (I'm not sure if GNR is part of Frankenthaler's process, but I'm betting there is some type of music involved)
Let dry for at least a week.

Use (or make) blank cards and envelopes, cut out viewfinder to fit onto cards.
Troll the large compositions using viewfinder to isolate smaller compositions.
Trace the inner window of viewfinder onto large painting as a cutting guide.

Cut out the small painting.

Glue "little" paintings to blank cards.
Write thank you notes... tomorrow.


PS- A couple of the onions have broken the surface! In less than 5 days. Amazing!